In this article, we will be discussing 5 free methods to convert OST file into PST file format.
Free Methods to Convert OST to PST
Method 1 – Use Import and Export Wizard
Note: This method will work only if your mailbox is connected to the Exchange server and you have Outlook installed on your machine.
Free Methods to Convert OST to PSTMethod 1 – Use Import and Export WizardMethod 2 – Recreate OST File and Convert it into PSTMethod 3 – Drag and Drop OST File Items to PSTMethod 4 – Use Archive Feature for OST to PST ConversionMethod 5 – Use OST to PST Converter Software
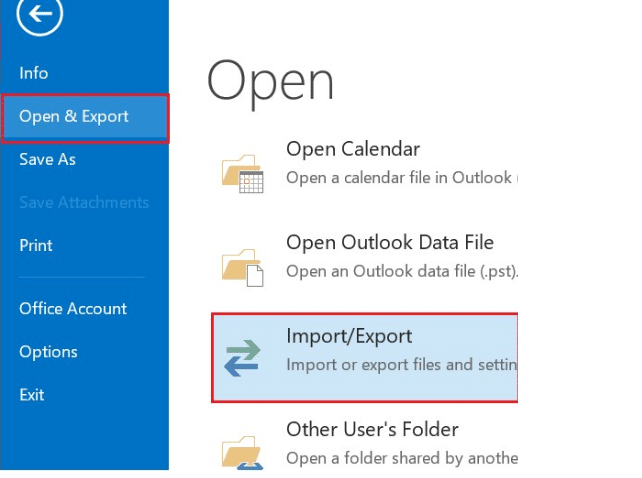
To convert OST file to PST by using Outlook Import/Export Wizard, follow the given steps: Step 1: Open your Outlook application, and click File. Step 2: In the window that appears, select Open & Export, and then click Import/Export.
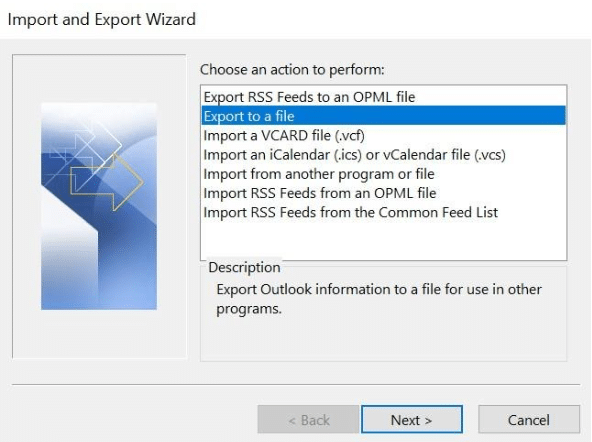
Step 3: From the Import and Export Wizard, select ‘Export to a File’ under Choose an action to perform section. Click Next to continue.
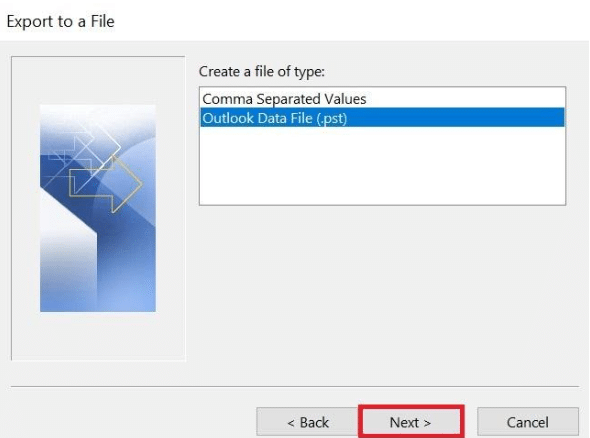
Step 4: From Export to a File dialog box, choose Outlook Data file (.pst), and then click Next.
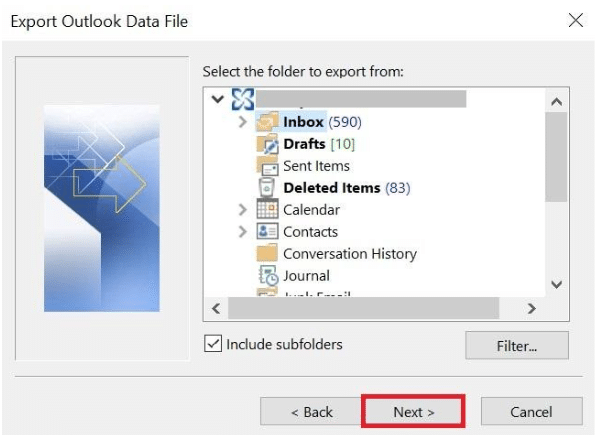
Step 5: From Export Outlook Data File dialog box, choose the folder you need to export from, and hit the Next button.
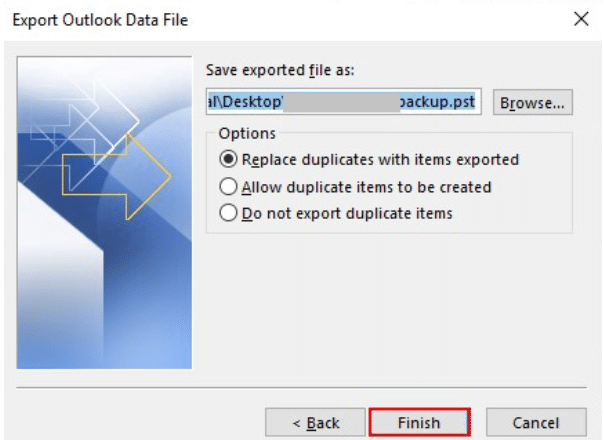
Step 6: Under Options section, choose any of the provided options, and hit the Finish button.
Step 7: Click OK when prompted and your OST file will get saved in PST format at the selected location.
Method 2 – Recreate OST File and Convert it into PST
If Outlook is connected to Exchange Server, you can recreate the OST file and then convert it into a PST file. This will save you from losing access to mailbox contents in situations when OST file data becomes damaged or inaccessible. For recreating an Offline Outlook data file (.ost), you just need to delete the .ost file and it will be recreated the next time you open the Outlook. For detailed information on recreating an OST file, refer to this link. Once the file is recreated, you can export it to an Outlook data file (.pst) by following the steps mentioned in the method above. Note: If you’re not able to access Outlook because the Outlook account is disabled, there is synchronization error, MAPI profile is damaged, etc., you may not be able to recreate the OST file. In that case, the only way to convert OST to PST is to use a software such as Stellar Converter for OST.
Method 3 – Drag and Drop OST File Items to PST
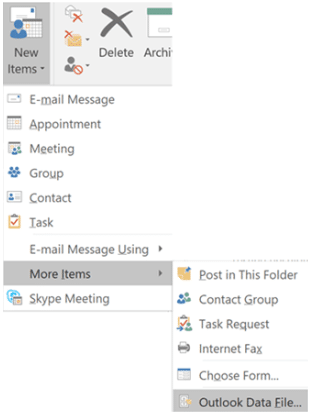
You can also perform conversion by dragging and dropping OST file items into a new PST file. To do so, follow these steps: Step 1: Launch Outlook. Step 2: Create a new PST file for your Outlook profile by following these steps: NOTE: Click ‘Add Optional Password’ if you would like to create a password-protected PST file.
Method 4 – Use Archive Feature for OST to PST Conversion
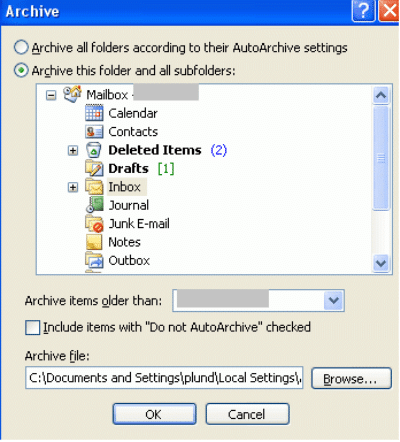
This method requires to archive OST mailbox folders to a PST file by following these steps: NOTE: Archive feature won’t work if your Outlook profile is connected to an Exchange Server. Step 1: In Outlook, click File. Step 2: Select Info, click Tools, and then click Clean Up Old Items. NOTE: This step applies to users using Outlook 2016 and higher version. In Outlook 2013, you need to choose Info > Cleanup Tools > Archive. Step 3: Now choose the Archive this folder and all subfolders option, and then select the OST mailbox folder you want to archive.
Step 4: Enter a date in the drop-down next to Archive items older than. Step 5: Click Browse to select the folder where you wish to save the archived file. Step 6: Specify folder name and click OK. The archived items will be moved to this location Step 7: Click OK to initiate the process. Once you’re finished with these steps, the selected files and folders will be moved to archive PST. Drawbacks of Manual Methods The above-discussed manual methods have certain limitations:
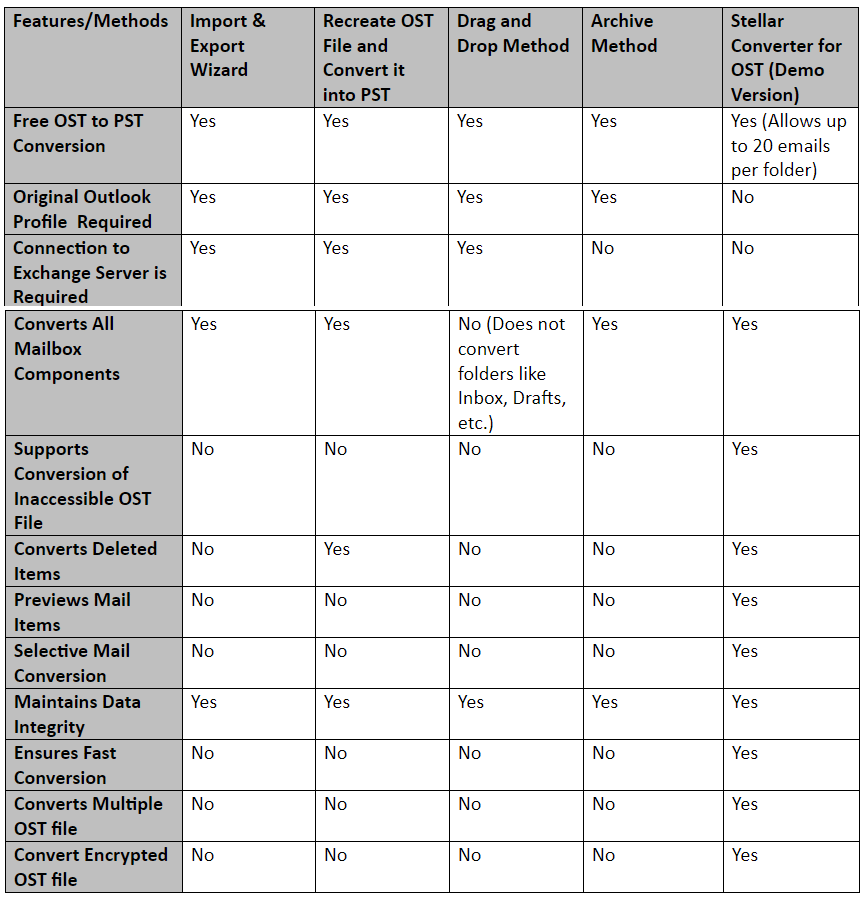
Requires original profile used to create OST file. Does not support conversion of inaccessible OST file. Performing all the manual methods can be time-consuming. Time taking for converting large-sized OST file. No option to preview before the conversion. Limited options for saving converted OST file as a PST file. Manual methods are prone to errors such as accidental deletion, overwriting of data, etc.
Method 5 – Use OST to PST Converter Software
You can overcome the limitations of manual methods by using the demo version of Stellar Converter for OST software, and here’s how:
Does not require original profile used for generating Offline Storage Folders (.ost) file. Supports conversion of inaccessible OST file to PST format. Converts OST to PST in a few simple clicks: ‘Select OST’, ‘Convert’, ‘Preview & Save as PST’. Performs conversion with precision and maintains data integrity.
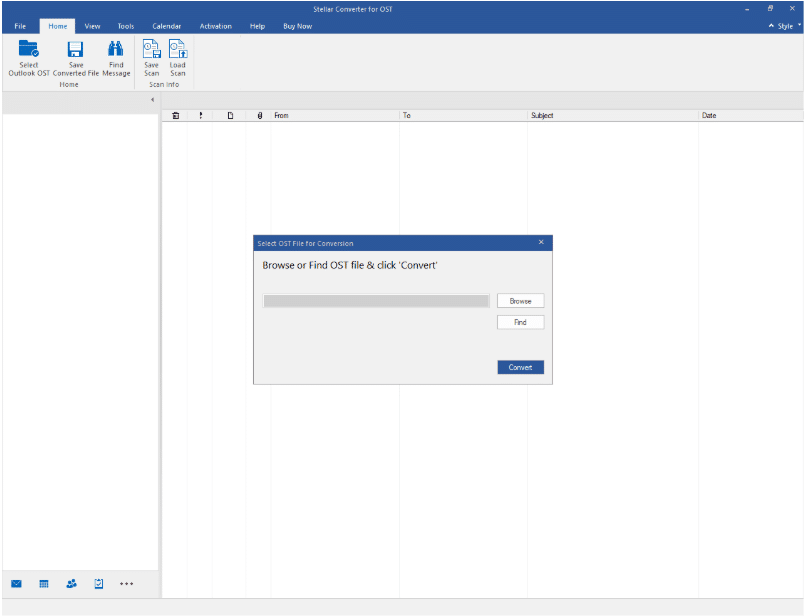
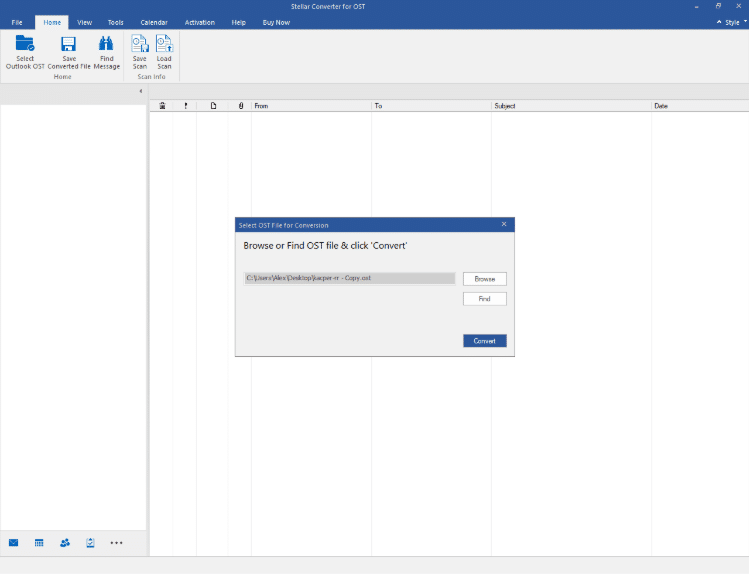
Detailed steps to perform OST to PST conversion are as follows: Step 1: Download, install and launch Stellar Converter for OST software. Step 2: In Select OST File for Conversion window, click Browse or Find to select the file you want to convert.
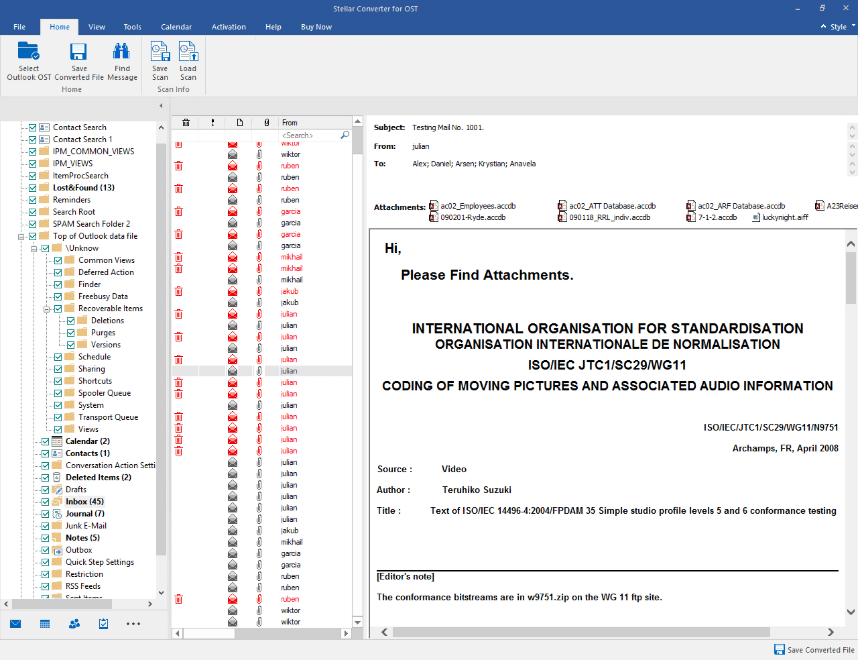
Step 3: Once the file is selected, click Convert to initiate the conversion process.
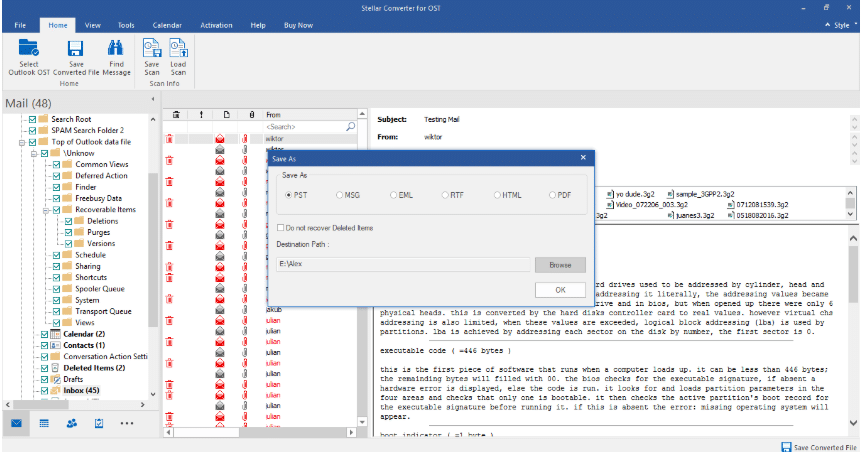
Step 4: The software displays a preview of the converted file. For saving the file, click Save Converted File on Home menu.
Step 5: In the Save As dialog box that appears, select PST under Save As, and then browse the location to save the PST file. Click OK.
The converted file will get saved at the selected location. Note: The demo version of the software allows to convert and save 20 items per folder for free. For saving all the converted OST file items as PST, you will need to activate the licensed version of the software. Stellar Converter for OST has a straightforward UI that makes the conversion process simple and quick. The tool extracts items from Offline Outlook Data File (.ost) file and saves them in PST format, maintaining integrity of the mailbox items. Also, the software is acknowledged by Microsoft MVPs for its ease of use and brilliant performance. Read MVP reviews here. Comparison between Free Methods to Convert OST to PST
